
How Can We Help?
GoArch Projects
My bad! Let’s make sure those filenames are explicitly written out as highly visible text placeholders so they don’t get lost in the markdown layout.
Here is the fully revised article with the explicit screenshot placeholders embedded exactly where they belong:
Goarch Projects Widget
The Goarch Projects widget is a powerful Elementor element designed specifically to display architectural or real estate projects cleanly and professionally. It pulls content directly from your project custom post types and allows you to showcase them using multiple layout variants, filtering tools, and precise typography controls.
Feature Overview
- Pre-made Demo Layouts: Switch between standard list/grid layouts and a modern Bento grid design.
- Dynamic Queries: Filter your displayed projects by specific categories or pinpoint exact items using post IDs.
- Complete Style Freedom: Independently adjust the typography, colors, borders, and shadows for project titles, images, and description texts.
Step-by-step Instructions
Follow these steps to add and configure the Goarch Projects widget on your page:
- Open your page or template with the Elementor editor.
- In the left panel, search for Goarch Projects.
- Drag the widget and drop it into your desired section or column.
- Use the Content tab to choose your layout configuration and filter your projects.
- Switch to the Style tab to customize colors, fonts, margins, and borders to match your brand identity.
Explanation of Settings
Content Tab
The Content tab manages what data displays on the frontend and how the basic structural items are arranged.
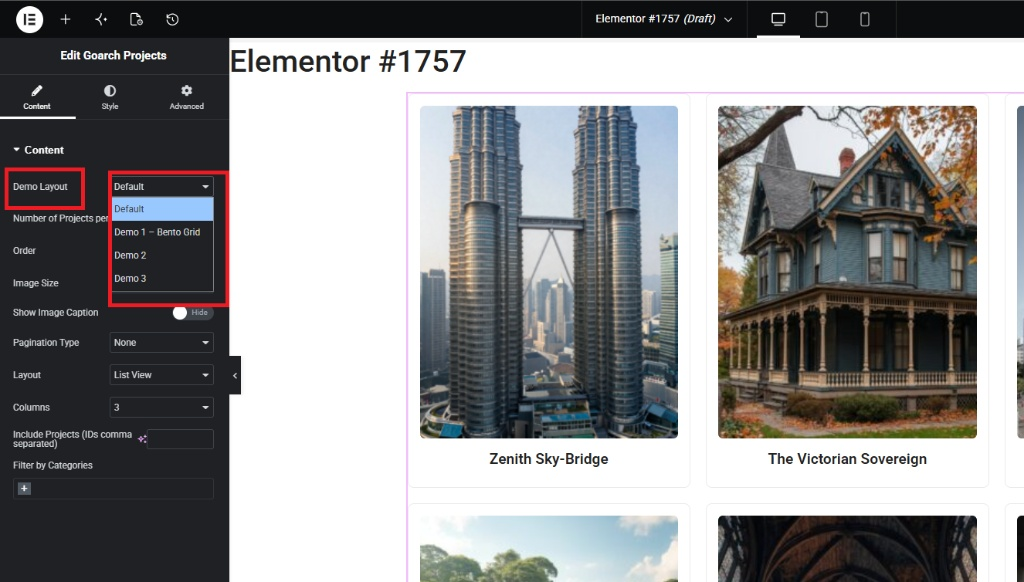
- Demo Layout: Choose from multiple predefined layouts, including Default, Demo 1 – Bento Grid, Demo 2, and Demo 3.
- Number of Projects per Page: Enter a numeric value to limit how many project items appear simultaneously (e.g.,
6).
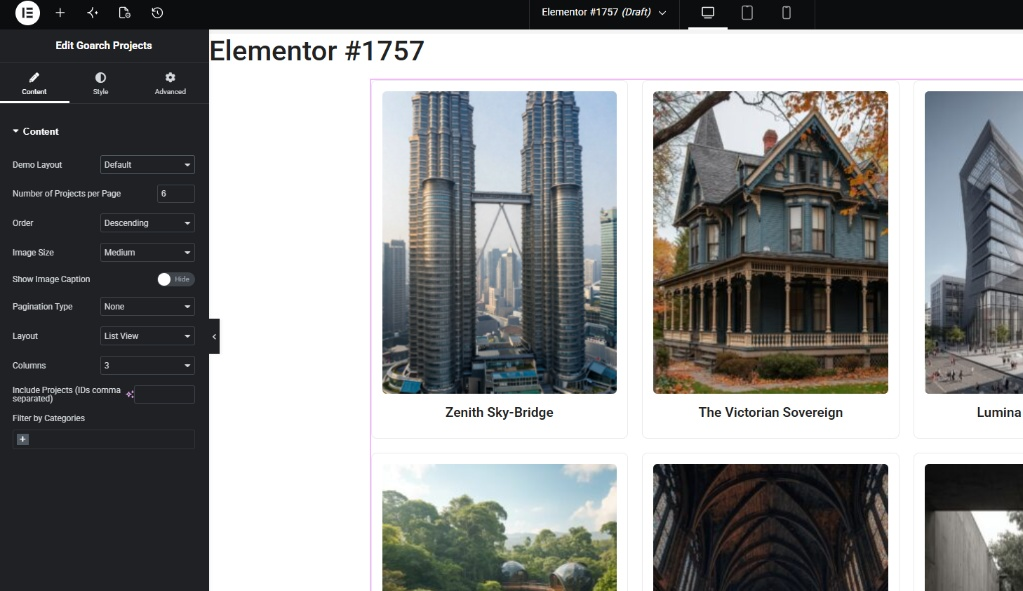
- Order: Sort projects by Ascending or Descending order.
- Image Size: Change the resolution of the featured image thumbnails (e.g., Thumbnail, Medium, Large, Full). Choosing an appropriate image size helps optimize page speed.
- Show Image Caption: Toggle this switch to show or hide text captions directly over the images.
- Pagination Type: Select how users navigate extra projects if the total count exceeds the page limit (e.g., None, Numeric).
- Layout: Define the primary orientation mode, such as List View.
- Columns: Choose how many columns to split your layout into (e.g.,
3). - Include Projects (IDs comma separated): Target specific projects to display by entering their exact WordPress post IDs separated by commas. Leave blank to fetch all projects.
- Filter by Categories: Click the plus
+icon to select specific project categories and restrict the widget to only show items within those taxonomies.
Style Tab
The Style tab provides deep aesthetic controls split across three primary design sections.
Title Style
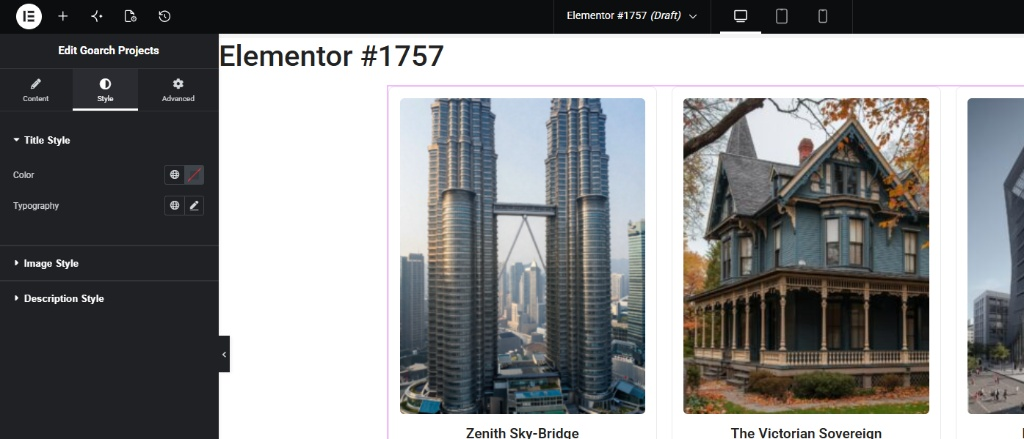
- Color: Choose a global color or custom hex color for the project titles.
- Typography: Click the pencil icon to configure font family, font size, weight, line-height, and letter spacing for the project title text.
Image Style
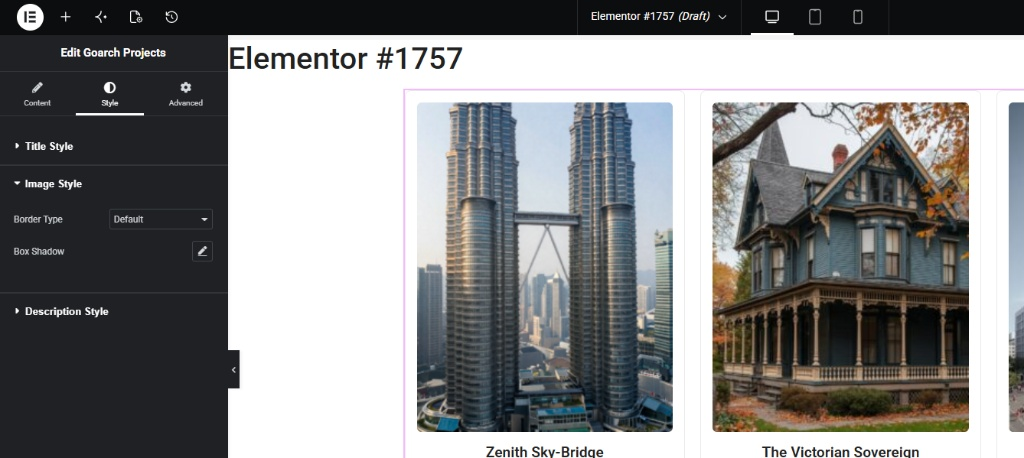
- Border Type: Apply borders around your project images (e.g., Solid, Double, Dotted, Dashed).
- Box Shadow: Click the pen icon to apply depth to your image cards by adjusting blur, spread, position, and shadow colors.
Description Style
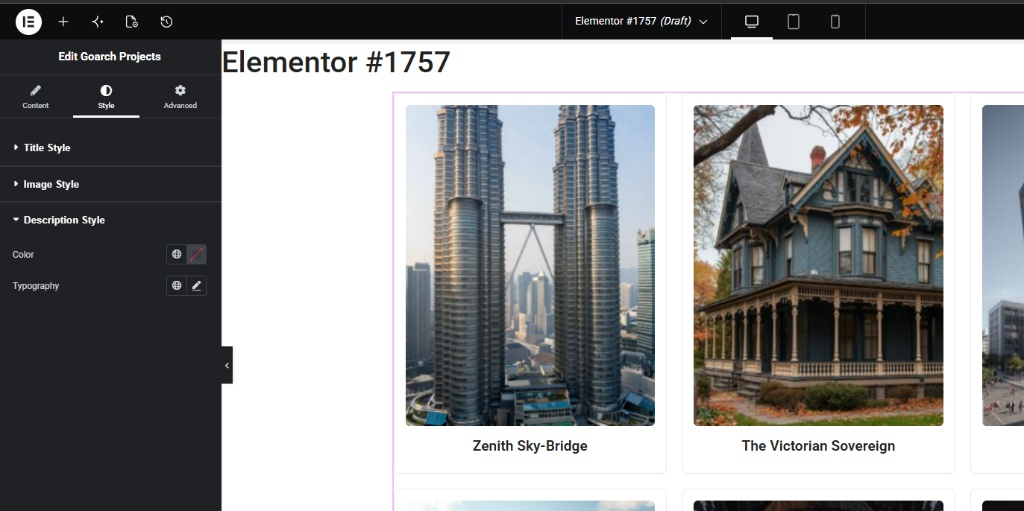
- Color: Change the text color of the short description or excerpt text.
- Typography: Access standard Elementor font styling controls to format your description text layout.
Advanced Tab
The Advanced Tab contains standard native Elementor options. From here, you can manage layout elements such as padding and margins, configure entry animations, assign custom CSS classes, or set responsive visibility behaviors for desktop, tablet, and mobile viewing modes.
Tips & Best Practices
- Maintain Aspect Ratios: For the cleanest grid output, ensure all featured project images share a consistent aspect ratio before uploading them to WordPress.
- Optimize Performance: Avoid choosing Full for the Image Size option unless absolutely necessary. Using Medium or Large significantly decreases page weight and improves loading speeds.
- Bento Grid Layout: When selecting the Demo 1 – Bento Grid option, try displaying a minimum of 4–5 projects to allow the alternating layout proportions to render as intended.
Troubleshooting
My images look blurry or distorted
This typically happens when the Image Size setting under the Content tab is set too low (e.g., Thumbnail). Try increasing the size setting to Medium or Large to match the visual dimensions of your layout columns.
Specific projects aren’t showing up
Double-check that your projects are fully published (not saved as drafts) and that your commas are correctly placed inside the Include Projects field. Ensure there are no spaces between the IDs (e.g., 123,124,125).