
How Can We Help?
Update the theme
As soon as a new theme version is released, you will receive an automated notification email from ThemeForest. Before updating Goarch on a live site, it is best practice to prepare your site carefully to prevent any loss of custom configurations or data.
Below is our recommended pre-update checklist to ensure a smooth transition.
Best Practices Checklist
- Review the Changelog: Always check the theme update notes / changelog to learn about new features, bug fixes, or breaking changes.
- Backup Files and Database: Always create a full backup of your website files and MySQL database before running updates. If a server issue occurs, you can immediately restore your site to its previous state.
- Clear Caches Post-Update: Reset your browser and plugin caches after the update finishes to force the latest CSS, JavaScript, and layout structure to load properly.
How to Update Goarch via WordPress Dashboard
Upgrading your website’s theme to the latest version ensures access to new features, performance improvements, and ongoing compatibility updates.
Step 1 – Upload & Replace Theme Files
- Log into your ThemeForest account, go to your Downloads section, and select “Installable WordPress file only” to download
goarch.zip. (If you downloaded the “All Files & Documentation” archive, extract it first to locategoarch.zipinside). - Log into your WordPress dashboard, navigate to Appearance > Themes, click Add New Theme, then click Upload Theme.
- Click Choose File, select
goarch.zip, and click Install Now. - Since the theme is already present on your site, WordPress will display a comparison screen showing the currently installed version alongside the newly uploaded version. Click the Replace installed with uploaded button.
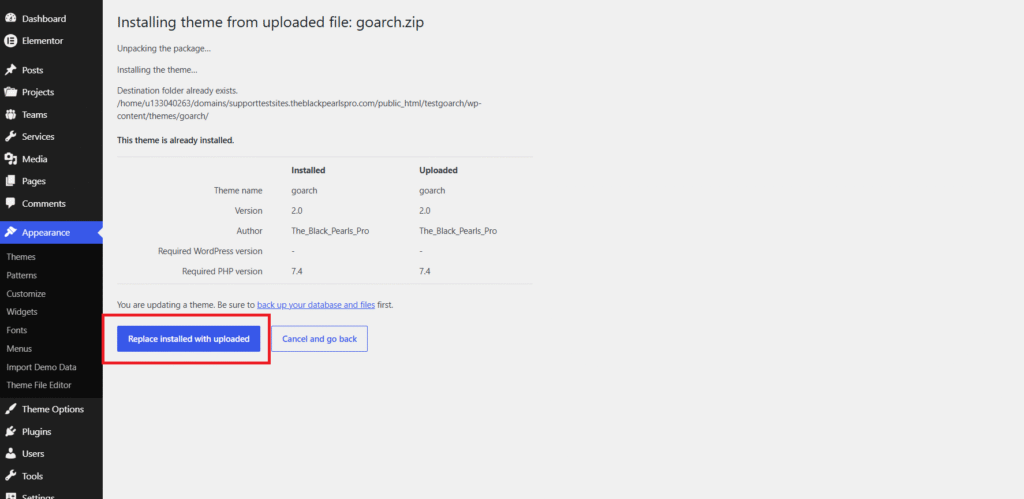
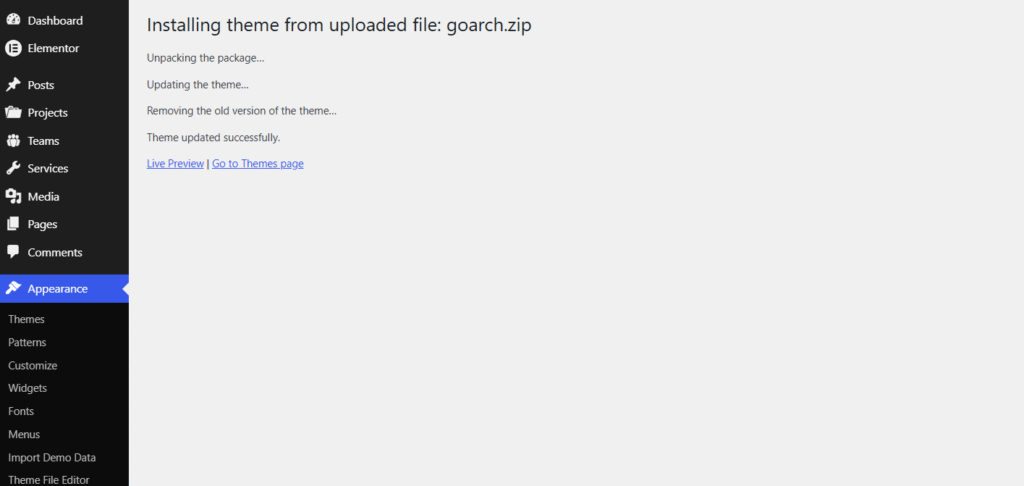
- WordPress will unpack the package, remove the old version, and confirm with the message “Theme updated successfully.”
Step 2 – Update Core Plugins
When you complete the theme update, a administrative notification bar will appear at the top of your dashboard informing you to update required and recommended plugins (such as Goarch Core or Elementor).
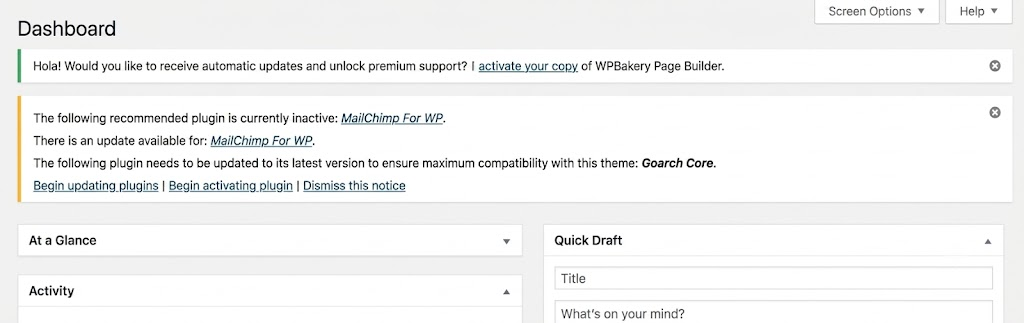
- Click Begin updating plugins inside the alert notice banner.
- Select all required plugins in the list, choose Update from the Bulk Actions dropdown menu, and click Apply.
Important Note: Once all theme and plugin updates are finished, clear your browser cache and any active caching plugins (e.g., WP Rocket, LiteSpeed Cache). Reload your site and perform a quick visual review to verify everything displays correctly.
How to Update Goarch via FTP
If you prefer updating your theme files manually over FTP:
- Enable Maintenance Mode: Place your site in temporary maintenance mode using a plugin (e.g., WP Maintenance Mode).
- Back Up or Remove Old Theme Folder: Connect via FTP, navigate to the
yoursite/wp-content/themes/directory, and download a copy of the existinggoarchfolder to your computer as a backup. - Extract Updated Files: Unzip the newly downloaded
goarch.zippackage on your computer to obtain the updatedgoarchfolder. - Upload via FTP: Open your FTP client (such as FileZilla), navigate to
yoursite/wp-content/themes/, drag and drop the newgoarchdirectory into the folder, and select Overwrite for all existing files. - Update Required Plugins: Log back into your WordPress dashboard and update any required plugins under Appearance > Install Plugins.
Child Theme Considerations
If you are using Goarch Child (goarch_child), you do not need to update the child theme directory. The child theme remains active and automatically inherits all underlying structural updates and bug fixes from the updated parent goarch theme while preserving your custom code overrides safely.